DIY Natural Lip Exfoliant in Minutes

I have been racking my brains trying to come up with something clever to use my little miniature jars for. I have had suggestions about using them to store herbs and spices but honestly can’t quite be bothered transferring all my spices from the jars they came in into my jars, without the little shaker lids. So I thought of something a bit more interesting.

I was once conned into buying a tiny little pot of lip exfoliant at a shop for about $12. This wouldn’t be so bad if not for the blatant fact that the only ingredients seemed to be sugar and oil and a little bit of pink colouring. The sales girl convinced me (and my friend) by giving us a tester and raving about how “you can even lick it off your lips when your done because it’s candy flavoured!”. Duh. It’s made of sugar you idiot, of course it’s “candy flavoured”. My friend and I (gullible as we are) bought a pot each and happily applied the magical lip exfoliant to our lips (and subsequently licked off the “candy flavoured”sugar) for the rest of our shopping trip. It was only later that night, when I excitedly showed it to my mum, that I realised we’d been ripped off. “You paid for that? It’s just sugar, you could make it!”

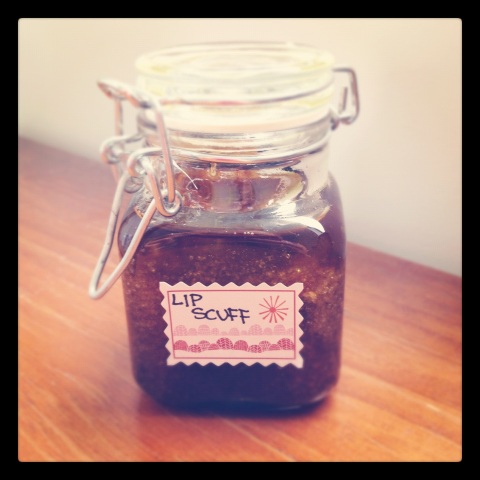
I’ve learnt my lesson. That expensive little pink pot has long since disappeared and so today I made some Lip Scuff of my own!

lip scuff

Homemade Lip Scuff

Homemade Lip Scuff

Ingredients:

  • 3 parts brown sugar
  • 2 parts honey
  • 1 part olive oil

Method:

  1. Place all ingredients into jar/pot/container
  2. Mix together
  3. Use a pea sized amount to rub on lips until smooth

I hope you like it!

Eleanor x

OMJ! (Oh My Jars!)

So, I was wandering around a shopping centre last week wasting time before a dance class was to start and stumbled into a massive $2 shop. Nothing special, it was filled with the usually crap that one finds in a cheap discount store. Except this one happened to have a treasure trove of…jars!

Exciting, right!? …..right?

Maybe it’s just me, but I have long been on the hunt for glass jars that don’t cost up to $20 a pop. Primarily, to store pantry items such as flour and sugar (I can think of 5 types of sugar I have in my pantry off the top of my head). So I got super excited when I found so many jars ranging from 50¢ for the itty bitty ones up to $3.50 for the big’uns.

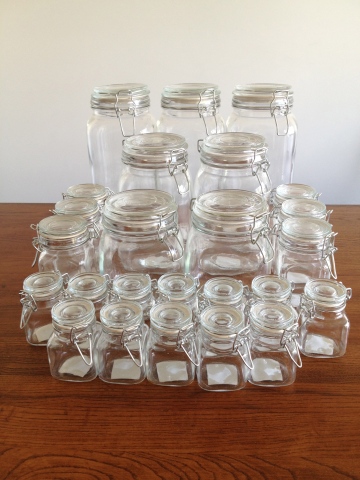
I feel that, according to most people, I should be ashamed to say that I spent over $50 on jars (especially considering that I can’t justify spending that much on any item of clothing..ever). But, well, I’m not ashamed at all! I spent $51.30 and look how many I got!

jars for diy projects

oohhhh so many jars...

How cute are the itty bitty baby ones!? I got them more for the cute factor as opposed to having any real plan to use them. I’m sure I’ll figure something out. I’m definitely going back for more of the big ones for storing baking supplies.

So far, I have a few ideas for the jars. I’m planning on using them for:

  • Pantry organisation (storing flour, sugar, pasta, rice etc)
  • Homemade candles in the jars
  • More homemade bath salts, moisturiser and body scrubs (see original post here)

Now – my question to you, dear readers, what do you think I should use them for? I would love to hear your suggestions and ideas for DIY or organisation projects using my fabulous treasure trove of jars.                        

 Comment below with ideas of your own, things you’ve seen, links..anything!

Once I get a few ideas, I’ll put them to the test and post on my success!

Thanks!

Eleanor x

DIY Detox Diary: Day Three & Final Thoughts

Ok, I’m just going to come out and say it. I cracked.

If you have read about Day One and Day Two of my juice cleanse so far, you will know that I have been struggling. And today, I cracked. I couldn’t handle another juice.

I woke up and diligently made my first juice, but by the time I should have been making Juice #2, I was so over it. I looked over at my juicer with mild hatred. Making 12 juices a day for the past two days had really gotten to me and I literally dreaded the thought of cutting and peeling fruit and vegetables, juicing them and then cleaning up the whole mess yet again only to have to do it all over again later that day.

I started well. I just had another raw salad instead of a juice. But then my stomach must have gotten a taste for real life food and even though my fridge was chocked full of fruit and veggies – I needed Protein. Just quietly, this is most definitely the worst way to end a detox. So I took myself for a walk down to the shops and sat at a cafe and ordered a chicken wrap and absolutely devoured it – chewing solid food has never felt so good! About half an hour later though, I felt sick. Serves me right. I knew better than to eat something like that after only having juice or raw salads for the past few days. But somehow my stomach managed to kill all common sense at that moment.

So, my final thoughts:

Don’t attempt to do a juice cleanse yourself. As much as you think you’ll manage making 6 juices a day with your at home juicer, your energy levels get so low that it becomes a struggle to bring yourself to deal with the preparation and clean up that is involved.

If you want to do a juice cleanse by delivery, I would recommend that you don’t use Schkinny Manniny and that you do use Urban Remedy (if you’re an Aussie only, of course!). Last year I did Urban Remedy’s Level One, 3 Day cleanse easily and felt absolutely amazing afterwards and continued to eat healthily post cleanse. Something about the Schkinny Manniny one is just off, and that is only heightened by the do it yourself aspect. I have since spoken to friends who have done the Schkinny Manniny cleanse by delivery and were also forced to break the cleanse because of how immensely unsatisfying their juices were.

I am not a nutritionist so I cannot claim to know the difference between the recipes and ingredient order of both cleanse companies. All I know is that the recipes for the juices on the cleanse I used were not satisfying enough to sustain, they were also significantly thinner than my memory of the Urban Remedy juices, which (potentially only psychologically) could have had an impact on my perception of satisfaction. Having spoken to friends about the cleanse, I have been told about the importance of “food stacking” in order for things to sit right in your stomach and avoid discomfort. Again, I cannot claim to know anything about nutrition, but perhaps the order of ingredients in the Schkinney Manniny cleanse compared to that of the Urban Remedy cleanse played a part in my success, or lack there of.

I hope that I haven’t completely turned you off the idea of doing a juice cleanse or detox with my experience. Honestly, it’s all about trial and error and well, I found an error. But one thing I can say is that a good detox, seen all the way through, leaves you feeling refreshed, energetic, healthy, glowing and (yes, if you have some excess weight to lose) lighter. Personally, I have never chosen to do a cleanse for weight loss as I don’t feel I have any weight to lose so I wouldn’t really recommend it if that is your only goal. The purpose of most juice cleanses is to clear out all of the toxins from your body and leave you feeling revitalised and fresh while also being a positive way of kick-starting a healthy diet.

Good luck if you choose to cleanse one day, please feel free to ask any questions you may have about my experiences!

Eleanor x

DIY Detox Diary: Day Two

My apologies for the delay in posting Day Two of my DIY Detox, I will post Day Two and Day Three today for you. For those of you who have no idea what I’m on about, check out my DIY Detox Diary: Day One and Preparation posts.

The day started well enough. We had our four day juices all ready to go in the morning which made the start of the day go a lot smoother and was a lot less stressful. Juice #1 & #2 went down fine – they are probably two of the tastiest of the six daily juices.

Luckily, we had learned our lesson from the hideous Juice #3 the day before and we added some tomato and a lot less ginger to it for lunch today. It went down alright, but it really isn’t that satisfying. I’m not finding myself hungry per se, just so unsatisfied by these juice to a point where I almost can’t be bothered drinking them.

Late afternoon I headed to the pool to meet up with some girlfriends, Juice #4 in tow in my ‘Schkinny Fresky’ (I cringe just typing that name) on ice for the drive over. As my luck would have it, I walked into the pool at the exact same time that three of the girls happened to be heading to the snack bar. Again, my inner monologue was having a screaming match with my stomach, intensely debating whether or not hot chips are, in fact, the best thing ever invented and pretty much my favourite food group of all time. I desperately rifled through my bag to find good old Juice #4, hoping it would be my saviour against the sweet smell of dirty, greasy, pool food while mumbling “No, I’m good” to my friends when they asked if I wanted anything. Another hot tip: avoid snack bars at all costs. I think I may have actually caught myself drooling whilst intensely watching my friend devour a potato cake.

At last we were done in the snack bar and we headed outside to find the other girls sun baking. One of the more health conscious girls (not that the others aren’t, they’re all dance teachers so a potato cake or a callipo now and then isn’t going to do much damage) was munching away on some nuts and kindly offered me some. It took all the (very, very little) energy I had not to scream “Do I want some nuts!? Do I want some nuts!? Of course I want some goddamn nuts, I’ve been living off shitty juice for the past two days!!”, while simultaneously grabbing the bag of nuts from her hands and stuffing them in my mouth like a ravage animal that has just been let out of captivity. Instead, I politely declined and proceeded to sip on my (now disturbingly warm) juice.

I got home in the evening after my afternoon in the sun feeling particularly weak and not at all in the mood for Juice #5. I had prepared this juice earlier in the day and only had to heat it up for us to have as our dinner but could not for the life of me bring myself to “eat” it. This feeling was not at all helped by my boyfriend complaining about how hungry he was as well as constantly rambling about all the food he wanted to eat. We both agreed that we were just so bored of the juices and so unsatisfied by them that we would rather go hungry than have another juice. I deliberated for quite some time about what to do (I honestly could not stomach another juice) and finally decided that it wouldn’t hurt that much, surely, if we had a cheeky salad for dinner with only raw vegetables.

So, that’s what we did – and I felt like such a failure for breaking it on day two, especially considering that I did a three day cleanse last year with no dramas at all. I figured maybe we would cut it down to three days instead of five, especially as we were planning on visiting my mum on Thursday for Australia Day, and just replace the lunch and/or the dinner juices with raw salads for the next day.

With this idea in my head, we still had our “dessert juice” which we both quite like, at the end of the night.

I was incredibly disappointed in myself for breaking the cleanse but was determined to power on and get through it.

Here’s to Day Three!

Eleanor x

DIY Detox Diary: Day One

Dear Detox Diary,

Today is my first day of my DIY Detox or my fruit and vegetable juice cleanse.

6.30am – Wake up after only 5 or 6 hours of sleep and get to work making our first 4 juices for the day. So glad I portioned up the fruit and veggies during my preparation yesterday but it is still taking ages to make 8 juices! Squeeze myself some lemon with warm water.

8.00am – Finish juicing just in time to send the boyfriend off to work with a detox goodie bag of 4 juices and some detox tea. I start on Juice #1: Spinach, Snowpea, Apple, Honeydew and Chlorophyll aka “Mean Greenie”. This one is really yummy!

8.30am – Getting a bit sleepy and exhausted with a slight headache, though this could be due to my lack of sleep and stressful morning of juicing and not the detox.

8.50am – Decide to go and rest in bed, so glad to be a uni student on holidays!

10.17am – Get a call from my boyfriend at work and chat about how we’re feeling and our plans for the week, finish my last quarter of juice one and feel refreshed but still a bit lethargic.

11.36am – Just got a tiny hunger pang, time for Juice #2: Celery, Apple, Ginger and Kiwifruit aka “Immuno Booster”. Another green one, this one is nice and refreshing. Feeling good!

12.42pm – Still working on Juice #2 (I’m such a slow poke!) and actually feel quite full!? Who knew juice could be so filling!

1.30pm – Called my boyfriend who is struggling, “Baby, this is so shit”. He’s not enjoying it at all! I wouldn’t want to be at work and having to use my brain too much today, must be hard.

2.00pm – A bit late on Juice #3: Carrot, Parsley, Beetroot and Ginger aka “Ginger Minge”. Holy crap, this one is disgusting! Way too much ginger! Pulled the foulest of faces attempting to skull this one, it helped a little bit to heat it up as a soup as suggested in my recipe book. Couldn’t for the life of me finish it, absolutely gross. Exchanged some texts with my boyfriend about how horrible it was.

3.15pm – Out shopping for more ingredients – I’m allergic to almonds which is a major ingredient in Juice #6 so was on the hunt for hazelnut milk and hazelnut meal to substitute. Wandering around the supermarkets looking for anything hazelnut and my inner monologue is going something like this: “Ohh look at all the bread, No! No, I don’t even want bread, I don’t even like bread. So doughy, mmmm. What’s that? Sushi! I mean..pffft who likes sushi? I don’t. I don’t even want any. I’m gonna go home and drink some juice, awww yeah. What’s that? Pizza! OMG I WANT PIZZA! Wait, no I don’t. Pizza sucks. Detoxing is good. Healthy healthy healthy..chocolate!?” The moral of the story being: For the love of God don’t go to a supermarket/anywhere that sells food while detoxing! And while we’re at it, don’t even listen to the radio. Or watch TV. It’s insane how many food ads there are or how often people talk about food. Torture.

4.30pm – Just got home from shopping. A bit late again for Juice #4: Rockmelon, Watermelon, Blueberries and Mint aka “Summer Burst”. Was looking forward to this one – it sounds so yummy! – but was a bit disappointed by the blueberry floaties which make it hard to enjoy drinking. Anyone who knows me knows I hate “bits” in my food, I’m weird about texture. Yes, other people are too, I’m not that odd.

6.00pm – My boy gets home from work and the first thing he says when coming in the door is, “Ahhhhh, I’m so hungry!”. Good thing I’m making our Dinner Juice/Soup #5: Tomato, Carrot, Basil, Capsicum and Garlic aka “Martie Toe”. Now this one is good. It tastes just like a yummy tomato soup – well, a watered down version. The basil in it is delicious. We decide to replace the ghastly Juice #3 with this one tomorrow. So much tastier.

6.35pm – The two of us set up in the kitchen to make up the four juices for tomorrow. After the crazy rush this morning, we decided it wasn’t worth draining our energy in the morning making juices on a deadline. As much as we couldn’t be bothered doing it now either, it was much better to do it now than in the morning. Ideally, the juice should be consumed as close as possible to the time it was juiced – which is why it makes more sense to juice your fruit and veggies in the morning. We’re happy to sacrifice some freshness and some loss of vitamins for the sake of our sanity.

7.45pm – I prepared the pumpkin juice earlier for Juice #6: Pumpkin, cinnamon, Hazelnut Milk and Hazelnut Meal aka “Pumpkin Pie” so I just popped the rest of the ingredients in a glass and stirred it around for our “dessert juice”. We were a bit skeptical about this one but it was surprisingly tasty. An acquired taste, but drinkable – even if it did have a few floaties.

8.00pm – We sit down to watch a movie, both pretty exhausted.

9.00pm – Bedtime! I know, ridiculously early, but the detox kit recommends you get an extra long sleep tonight and we were both ready to just pass out.

10.13pm, 11.17pm, 12.34am – Keep waking up to pee – too much damn liquid in my system! All I want to do is sleep!

1.23am – Wake up again with an incredibly dry throat and a bit of a cough. Try to have enough water to help my throat but not too much so as to wake me up an hour later to pee again.

Well, that was Day One of my DIY Detox. All in all, not too bad. Yes it really sucks not eating solid foods but I keep trying to remind myself of why I am doing this and how great I will feel afterwards. My body will love me for it. I think it’s much harder for my boyfriend – a first time detoxer – as he hasn’t experienced the amazing post-cleanse feeling so it’s hard for him. I’ve been trying to remind him to think positively and about the goal – but then he just starts talking about cupcakes and opening the pantry to smell some crackers or something. I think he’s getting a bit delirious.

Here’s to Day Two! Wish me luck!
Eleanor x

DIY Detox Diary: Preparation

Around this time last year I decided to do a detox that I had been told about. This one wasn’t about eating only carrots or living off lemon juice, cayenne pepper and water for 2 weeks (like the Lemon Detox Diet – worst detox you can do, so unhealthy!). Instead, this was a Juice Cleanse. The idea is that you only drink juice for 3-5 days while detoxing. The juices are specially formulated to provide you with adequate nutrients during your detox while also being packed with vitamins and minerals to help restore, revitalise and rejuvenate your body.

Last year, I did a 3 day, Level One cleanse with Urban Remedy which set me back over $200 as all my juices were delivered fresh to my door. I had amazing results after just 3 days and felt the healthiest, clearest and most energetic I have ever felt before in my life. Amazing!

So, it is no surprise that I was keen to do another detox this year (ideally I’d like to cleanse once every few months). Unfortunately, however, my bank account wasn’t willing to shell out another $200-$300 for the 5 day cleanse I wanted to do this time. So, I started researching for recipes to do it myself at home – because I was lucky enough to receive a brand spanking new juicer a few weeks ago from my ever so wonderful boyfriend – details here. Lucky for me, I came across the DIY Detox Kit offered by Schkinny Manniny (I know, horrible name right?).

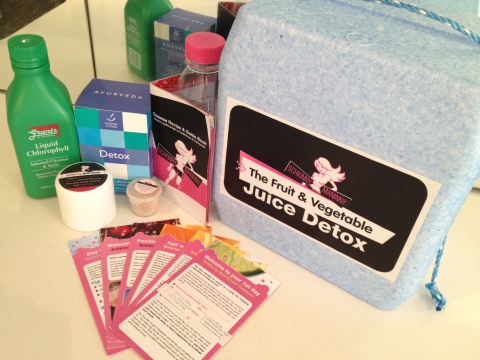
Juice Cleanse Materials

The Schkinny Manniny DIY Detox Kit

This Kit Contains:

  • Recipe Booklet
  • Daily Cards with Do’s and Don’ts
  • Esky
  • 6 Water Bottles
  • Liquid Chlorophyll
  • Detox Tea
  • Bath Soak
  • Psyllium Husks
  • Loofah for Dry Skin Brushing (not pictured)

After waiting desperately for over a week to receive my kit I hurried out to my local fruit shop as soon as I finally got my kit with the recipes and ingredients to buy all the fruit and veggies I would need for my 5 day cleanse.

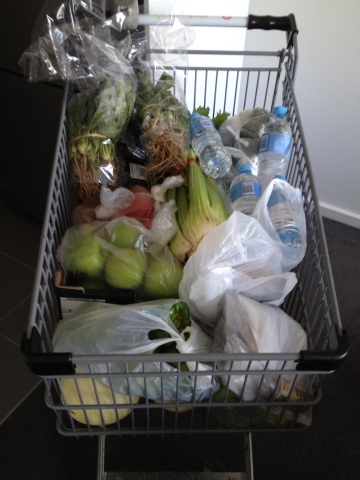
Somehow, my boyfriend managed to jump on board so we went shopping together and bought double the ingredients listed in the recipe booklet. We were in the fruit shop for a good half an hour getting everything – I worried we might clean them out! We had 3 baskets full and I dreaded the total. Luckily, it always pays to go to local fruit shops over supermarket chains and we were set back only $88.30 for 5 days worth of fruit and veggies for the tow of us. Pretty damn good if you ask me!

Shopping for Juice Cleanse

Trolley full of fruit and veggies - there's more underneath!

I’m a bit of an organisation junkie. So, I decided it would be easier for my sanity in the morning to portion up all the ingredients into groups for each juice so I could easily throw all the ingredients in the juicer rather than spending ages chopping and peeling and riffling through the fridge to find the ingredients for each juice I had to make for the day. I have to admit, I also got a kick out of organising, ordering and labelling my fruit and veggies into containers and freezer bags.

Juice cleanse

mmm so organised 🙂

Well, that is all from me for now. I will be updating my blog with my progress with daily posts throughout my detox – stay tuned!

Have you ever tried a detox/juice cleanse? What did you think?

Eleanor x

DIY: Homemade Votive Candle Holders

I have a few dinner dates coming up and wanted to create a nice centrepiece for our dining table. I really wanted to experiment with making a decorated votive candle holder of some sort to place around a vase of pink gerberas. I took myself to Kmart and a $2 shop and found everything I needed…

Homemade Votive Candle Holders

the finished product!

Supplies:

  • Mason Jars
  • Tea light Candles
  • Pearl Beads
  • Skeleton Leaves (found with scrapbooking supplies)
  • Doilies (paper or fabric)
  • Glue (I used Clag)
  • Newspaper

$2 mason jars from kmart

20120114-142451.jpg

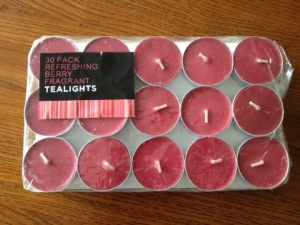
$3 pack of 30 tea light candles from kmart

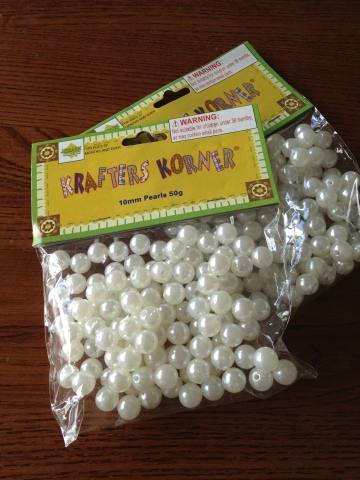
craft pearl beads

skeleton leaves, $5/pack from kmart

$2 store paper doilies


Method:

  1. Start by cleaning the the jars and discard the lids
  2. Lay down newspaper on your workspace
  3. Cover leaves in glue and place on the outside of the jars, smoothing down and adding a layer of glue on top – it is up to you how many leaves to put on the jars
  4. Place tea light candle in the bottom of the jar and drop in pearl beads to surround the candle
  5. Let leaves dry
  6. Place finished jar on a doily
  7. *If you like, grab some ribbon or twine to wrap around the top*

completely cover leaf with glue (excuse the random picture on the newspaper underneath!)

use as many pearls beads as you like to surround the candle

my finished centrepiece

You may notice that I completely covered one jar with the skeleton leaves and only used four on the other two jars. I decided I liked them better with fewer leaves, but feel free to create your own design. You might also like to try three leaves in a fan shape on one side of the jar  (I think I will try this design next time!).

I chose to buy pink coloured tea light candles to match my pink gerberas, feel free to use any colours you like. Also, there are plenty of options for decorating the jars. You could use pieces of fabric (like Fellow Fellow) or any other paper cutouts or pre made scrapbooking materials you may come across. The same goes with the pearl beads – I chose pearls as I though it would go nicely with the general theme – but you can use anything; moon stones, sand, rice..anything! Get creative!

Tip: some tongs may help when arranging the beads around the candle.

Good luck! If you decide to make these, let me know how you go – and send photos!

Eleanor x

P.S. If you are looking for more DIY ideas, check out the DIY tab at the top of the page. You might also like my post about homemade beauty products!

Homemade Gifts: Body Scrub, Bath Salts and Hand Cream

In the lead up to Christmas last year, I was a tad bit broke and a bit worried about what I was going to do for Christmas presents with no money to buy anything. So, I got crafty. I decided I would have a DIY Christmas and make my own presents. Not only was this option easier on my bank account, but it also gave me something fun to do (I’m on uni holidays so I welcome a project!) as well as adding that personal touch that makes giving gifts a bit more special. I’ve always like the idea of giving handmade gifts – it just seems so much more thoughtful than handing over a gift voucher or something generic like that.

So, along with my Homemade Toasted Muesli that I gave out as gifts, I made some beauty products for the girls (my mum and my boyfriend’s mum). Once I had made the soak, scrub and cream I popped them in cute little jars (just from a $2 shop) with pretty little labels (mine are from kikki.K – I am beyond obsessed with that shop!).

Lavender-Scented Milk & Salt Bath Soak, Peppermint-Scented Sugar Scrub and Rose-Scented Hand Cream


Sugar Scrub

The Sugar Scrub was the easiest to make of the three. I adapted my recipe from Martha Stewart’s blog.

Ingredients:

  • 2 cups coarse sugar (I used granulated raw sugar)
  • 1 cup oil (good quality, low scent)
  • your choice of scented essential oil

Method:

  1. Stir together sugar and oil
  2. Add essential oils, a few drops at a time until you have reached desired scent
  3. Spoon mixture into jars


Milk & Salt Bath Soak

Ingredients:

  • 2 cups powdered milk
  • 1 cup rock salt (optional)
  • 1/2 cup baking soda
  • your choice of scented essential oils

Method:

  1. Stir together powdered milk, salt and baking soda
  2. Add essential oils, a few drops at a time until you have reached desired scent
  3. Spoon mixture into jars

To Use: Add 1/4 – 1/2 cup to bath


 Hand Cream

This cream can be used anywhere on the body, I have just labelled it as hand cream. I found this recipe on Patchwork Times via Pinterest (another obsession!). The recipe on the website lists ounces, but I didn’t have a way to measure so I just used cups and adjusted accordingly. I also added some rose scented essential oils, you can add whatever you like.

Ingredients:

  • 2 cups Baby Lotion
  • 1 cup Vaseline
  • 1 cup Vitamin E Cream
  • your choice of scented essential oils

Method:

  1. Place all ingredients in a bowl
  2. Mix together with electric mixer until it looks like icing
  3. Add essential oils, a few drops at a time until you have reached desired scent
  4. Pop into jars/containers


What do you think of these products as gifts? Have you ever made anything similar? What are your favourite homemade gifts?

Eleanor x