Grumblies

Huh? Grumble-what? Grumblies. I have no idea where the name was conjured, but I can tell you one thing – these cookies (yes, that’s right, I’m talking about cookies) are delicious!

One of my best friends first introduced me to these tasty treats a couple years ago and they have been a favourite of mine ever since. I always seem to have to ingredients on hand, much like I do for my Anzac Biscuits. They are packed full of nuts, seeds, sultanas and oats which gives one the impression that they’re healthy. As far as sweet treats go, they’re definitely healthi-er than Chocolate Chip Cookies or cupcakes, but they’re still yummy! I also like to add a tablespoon of Chia seeds to my Grumblies for an extra kick of goodness!

I made up a batch of Grumblies last night because a) I wanted to put one of my new jars to use and b) my boyfriend’s co-worker has been bugging me ever since the last time I made Grumblies for more Grumblies. Honestly, every time I see him, he mentions Grumblies. Yes, they’re that good. I haven’t made them for a while and had some spare time, plus I wanted to share the recipe with my followers so, naturally, I had to make them in order to include a photo in this post (hard life, right?).

Grumblies Recipe

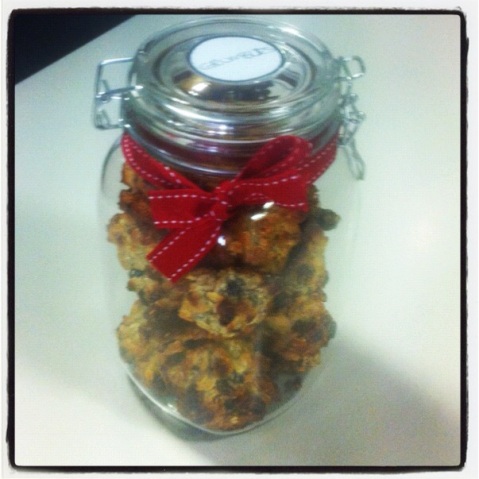
Grumblies in a Jar!

 Grumblies

Ingredients:

  • 2 eggs
  • 1/2 cup vegetable oil
  • 3/4 cup sugar
  • 1 teaspoon vanilla essence
  • 1 cup skim milk powder
  • 2/3 cup chopped walnuts
  • 1 cup sunflower seeds
  • 1 tablespoon chia seeds
  • 1 cup sultanas
  • 1 1/2 cups rolled oats

Method:

  1. Preheat oven to 190°C
  2. In a medium sized bowl beat the eggs
  3. Add oil and beat again
  4. Add sugar and vanilla essence
  5. Mix well
  6. Stir in milk powder
  7. Mix in nuts, seeds and sultanas
  8. Stir in oats
  9. Mix well
  10. Roll or spoon out into balls and place on a greased baking tray
  11. Bake for 10-12mins or until golden brown
  12. Cool on a wire rack

I placed my Grumblies into one of my medium sized jars and finished it off with some ribbon and a label from kikki.K.

I hope you like them!

Eleanor x

Double Choc Chip Cookie Dough Ice Cream

Yes, yes I know I’ve rattled on about next month’s Happiness Project Goal being Health…but I felt like making ice cream! Plus, it’s not March yet!

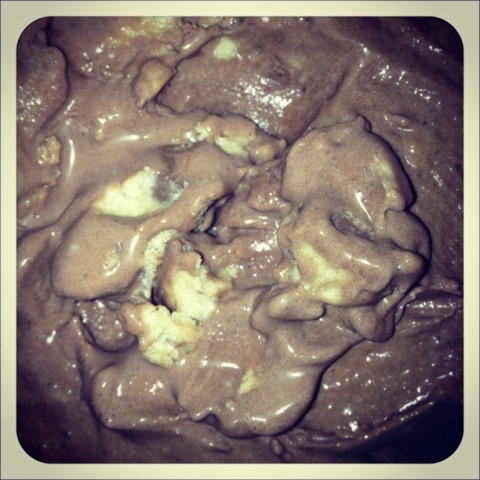
This is a recipe I’ve used before with much success. I used the basic chocolate ice cream recipe from the booklet that came with my ice  cream machine and then added bits of homemade chic chip cookie dough. If you haven’t tried the world’s best Chocolate Chip Cookie recipe yet…why not!? You can find it here.

home made ice cream recipe

Double Choc Chip Cookie Dough Ice Cream

Chocolate Ice Cream

Ingredients:

  • 1 cup unsweetened cocoa powder (Dutch process preferred)
  • 2/3 cup granulated sugar
  • 1/2 cup firmly packed brown sugar
  • 1 1/2 cups whole milk
  • 3 1/4 cups heavy cream
  • 1 tablespoon pure vanilla extract

Method:

  1. Place the cocoa and both sugars in a medium bowl and stir to combine
  2. Add the milk
  3. Mix on low speed (or whisk) to combine until cocoa and sugars are dissolved
  4. Stir in heavy cream and vanilla
  5. Pour into ice cream machine and follow manufacturers instructions
  6. Add small rolled balls of chocolate chip cookie dough to mixture 5 minutes before it is done
  7. Transfer to freezer safe container and freeze

This recipe is so yummy! Enjoy!

Eleanor x

Savoury Pancakes

So, apparently yesterday was Shrove (or Pancake) Tuesday. And according to Wikipedia, that has something to do with Lent, Easter and fasting. All I heard was pancakes. Mmm pancakes! I had actually been planning on making these savoury pancakes for dinner sometime this week since my boyfriend ever so subtly brought all the ingredients home one day. So, rather than making them for dinner on a Wednesday or even (heaven forbid!) a Thursday, I thought I would make them on Pancake Tuesday!

This is a recipe of my mum’s (like most of my recipes) and I remember looking at her like she was bat-shit crazy when I was fourteen and asked what was for dinner and she replied with, “Savoury Pancakes!”. Seriously, mum? Gross.

How surprised I was upon tasting these pancakes, with chicken and bacon in them, to discover that they were delicious! (I had thought she was making normal sweet pancakes and putting meat and cheese into it! Mamma you crazy!)

This recipe makes about 7 medium pancakes so only serves about 2 well, it is best to double for any more people.

savoury pancake recipe

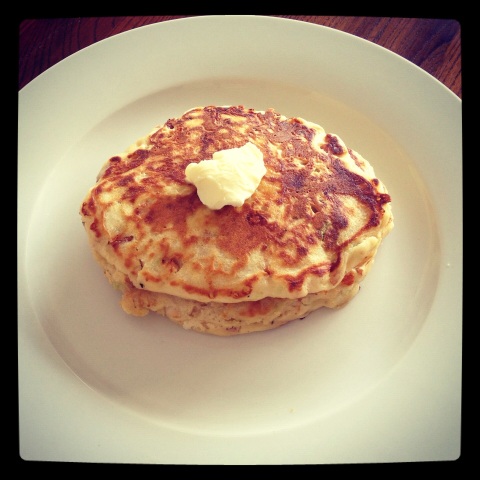
Savoury Pancakes with Chicken, Bacon, Cheese & Spring Onions

Savoury Pancakes

Ingredients:

  • 1 cup self-raising flour
  • Pinch of salt
  • 1 egg, lightly beaten
  • 1¼ – 1½ cups milk
  • 1 cup chopped, cooked bacon
  • 1 tablespoon finely chopped spring onions
  • ½ teaspoon Worcestershire sauce
  • A good grinding of pepper
  • ½ – 1 cup cheese, grated
  • ½ – 1 cup chicken, chopped (optional)
  • Oil for greasing pan

 Method:

  1. Sift the flour and salt together
  2. Mix the beaten egg and milk together and pour over the flour mixture, folding through gently with a rubber spatula or large metal spoon (the mixture will still be lumpy)
  3. Add bacon, spring onions, sauce, pepper, cheese and chicken and fold in lightly
  4. Heat a large heavy frying pan or griddle iron and grease the surface lightly
  5. Place the mixture on in spoonfuls, and cook on both sides
  6. Lift onto a cloth-covered cake cooler
  7. Serve with butter on top

Enjoy! And thank you to ediblesubstance for inspiring me to write a Pancake Tuesday post!

Eleanor x

Caramel Ice Cream with Choc-Macadamia Bits & Chocolate Sauce

I had promised to make the girls at my dance studio a batch of my home made ice cream for a few weeks now and thought (on my day off) it was high time to come through with the goods! It also just so happens to be one of my dance teacher’s birthday today, too. Perfect!

I wanted to try something a bit different to my usual go-to seriously rich chocolate with mix-ins ice cream. So I hunted around a bit for some ice cream recipes and finally found this Caramel Ice Cream recipe that looked quite nice. But, I couldn’t really fathom making plain ice cream, so I thought I’d make it a bit more interesting by adding in some chopped chocolate and macadamias as well as some yummy Haigh’s Chocolate Sauce (my Valentine’s gift).

caramel choc macadamia ice cream recipe

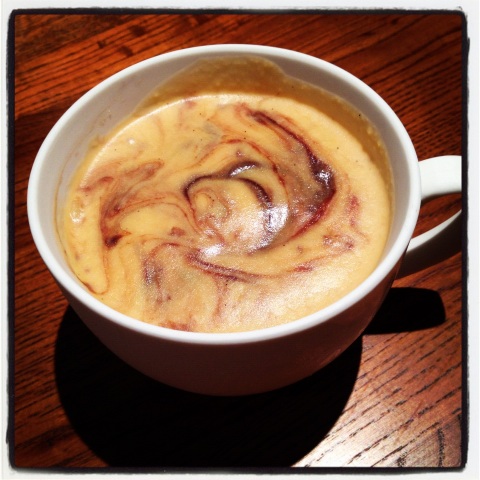
leftover ice cream in a teacup!

Caramel Ice Cream 

Ingredients:

  • 8 egg yolks
  • 350mL full cream milk
  • 250g caster sugar
  • 1 vanilla bean, split (or 1 teaspoon vanilla bean paste)
  • 300mL thick cream
  • 1 block macadamia chocolate
  • Chocolate sauce

Method:

  1. Lightly whisk egg yolks in a bowl
  2. Gently heat milk in a small saucepan over medium heat and pour over the eggs
  3. Stir well to combine, then set aside
  4. Place sugar and 2 tablespoons of cold water in a saucepan over low heat and stir to dissolve sugar
  5. Increase heat to medium and cook until mixture begins to turn a rich golden colour
  6. Add vanilla bean (or paste) and cook for a few seconds (don’t let the mixture get too dark or the ice-cream will be very bitter)
  7. Very carefully pour in the cream (it will splatter quite a lot at this stage)
  8. Reduce heat to low and stir to melt the lumps of caramel that have formed
  9. When it is smooth, stir in the egg mixture
  10. Continue to cook, stirring constantly, until the mixture thickens
  11. Transfer to bowl and leave in fridge for a few hours or overnight until cool
  12. When mixture is cooled, pour into ice cream maker and mix for 20-25mins
  13. Add in chopped macadamia chocolate and let mix for 5mins
  14. Transfer into freezer container one-third at a time, placing a thin layer of chocolate sauce between each layer
  15. Gently fold mixture a few times to create a swirl with the ice cream and the chocolate sauce
  16. Place covered in freezer

This ice cream is seriously rich! The recipe I used and modified only made a fairly small amount – if you make it you might like to try mixing it with some homemade vanilla bean ice cream as well, it may tone down the intense caramel flavour.

Good luck!

Eleanor x

Anzac Biscuits

Anzac Biscuits are my go-to quick sweet treat. They are so easy to make – you can have a batch ready in half an hour – and I always have all the ingredients I need in my cupboard. I love mine soft and chewy, other prefer them crisp and crunchy. They are sweet and delicious.

For those of you out there who aren’t from Australia or New Zealand, you may have no idea what an Anzac Biscuit is. This sweet cookie was said to be sent by wives to Australian and New Zealand Army Corps (ANZAC) soldiers abroad during World War I because the ingredients in them wouldn’t spoil and kept well when shipped.

Oat Cookies recipe

Yummy Anzac Biscuits

Anzac Biscuits

Ingredients:

  • 1 cup flour
  • 1 cup sugar
  • ¾ cups coconut
  • 1 ¼ cups rolled oats
  • 2 heaped dessertspoons golden syrup
  • ½ cup margarine or butter
  • ½ tsp soda
  • 2 tablespoons boiling water

Method:

  1. Heat oven to 160°C (320°F)
  2. Mix flour, sugar, coconut and oats together
  3. Melt syrup and margarine together
  4. Mix soda with boiling water and add to margarine/syrup mixture
  5. Add to dry ingredients
  6. Place dessertspoons of mixture on a greased baking tray
  7. Bake in a slow oven for 15 minutes (soft) or 20 minutes (hard)
  8. Cool on trays (note that they harden as they cool)
ingredients for anzacs

Dry mixture for ANZACs

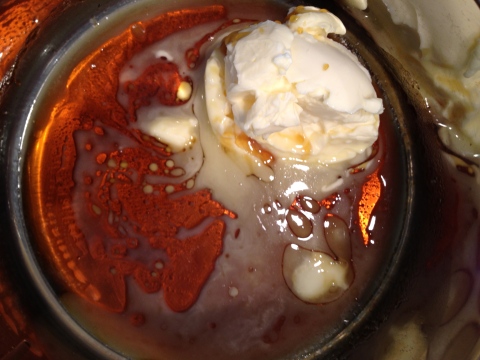
wet mixture for anzacs

Melt the butter and golden syrup on a low heat

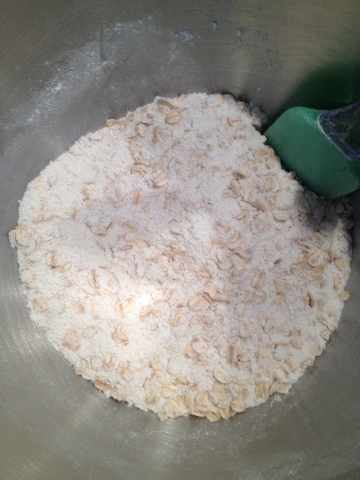
anzac recipe

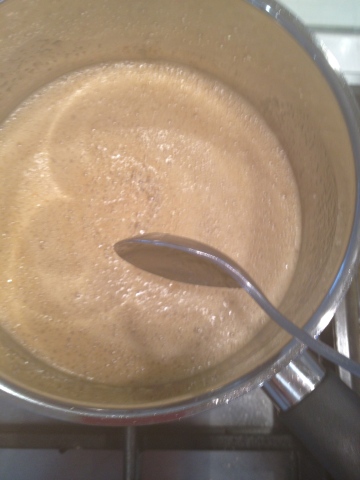
Mixture should foam up a bit when bicarb and water is added

For those of you who have never tried an Anzac biscuit, I hope you will try these! I promise they are really really yummy!

Oh and I should mention that I whipped up a quick batch of these to take to a meeting with a friend as a thank you and used one of my jars (from my OMJ post) completed with some pretty pink ribbon and a kikki.K label. Apologies for not having a photo to show for it, but I was in a hurry to give them to her! More jar posts to come, promise!

Enjoy!

x

Sweet and Sour Pork

Firstly, let me apologise for my lack of posts over the past week. I haven’t had a spare moment, luckily I am planning on writing a whole stockpile of draft posts soon so I always have something on hand to post regularly for you.

Now, I am not traditionally one to scour cooking magazines for recipe ideas and dinner inspiration but I recently picked up one of those cheap recipe idea magazines from the supermarket checkout (Recipes+) and found a whole lot of gems – including this sparkly one!

Quick, Cheap Recipes

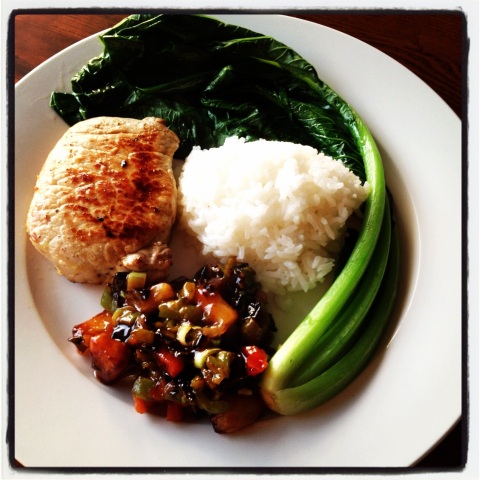
Sweet and Sour Pork Medallions with Choy Sum and Jasmine Rice

Sweet and Sour Pork Medallions

Serves 4

Ingredients:

  • 4 x 125g pork loin medallions
  • 1 medium green capsicum, chopped
  • 1 medium yellow capsicum, chopped
  • 2 tablespoons of vegetable/olive oil
  • 225g can pineapple pieces in natural juice, drained
  • 3/4 cup (store bought)sweet and sour sauce, heated
  • 2 green onions/shallots, thinly sliced
  • 1 bunch (230g) choy sum
  • 2 teaspoons sesame oil
  • 3 cups cooked long grain white rice

Method:

  1. Put rice on to cook first while you cook the main meal
  2. Place pork medallions, chopped capsicum and oil in a large bowl and toss to coat
  3. Season with a little bit of salt and pepper
  4. Preheat a large char-grill pan over moderately high heat (I don’t have a char-grill pan, just a normal one works fine though)
  5. Cook and turn pork and capsicum in pan together for 4-5 minutes, or until the pork is golden and cooked through
  6. Transfer pork to a heatproof bowl and cover with aluminium foil and rest for 5 minutes
  7. Transfer capsicum into a medium sized heatproof  mixing bowl
  8. Add pineapple to char-grill
  9. Cook and turn for 2-3 minutes or until golden
  10. Transfer to bowl with capsicum
  11. Add the heated sweet and sour sauce and the sliced shallots to the bowl and toss gently to combine
  12. Pour boiling water over the choy sum in a large heatproof bowl to cover
  13. Stir until just wilted and drain
  14. Add sesame oil and toss to coat
  15. Serve up cooked rice, choy sum, pork medallions and sweet and sour mixture onto a plate
  16. Enjoy!

I have never before had sweet and sour pork like this, and it was absolutely delicious! The only sweet and sour pork I’ve ever had is that horrid deep fried stuff from Chinese takeaway that seems to be floating in an overpowering sauce. This version is simple, clean and tasty. I hope you try it and enjoy, let me know what you think!

Eleanor x

DIY Detox Diary: Day One

Dear Detox Diary,

Today is my first day of my DIY Detox or my fruit and vegetable juice cleanse.

6.30am – Wake up after only 5 or 6 hours of sleep and get to work making our first 4 juices for the day. So glad I portioned up the fruit and veggies during my preparation yesterday but it is still taking ages to make 8 juices! Squeeze myself some lemon with warm water.

8.00am – Finish juicing just in time to send the boyfriend off to work with a detox goodie bag of 4 juices and some detox tea. I start on Juice #1: Spinach, Snowpea, Apple, Honeydew and Chlorophyll aka “Mean Greenie”. This one is really yummy!

8.30am – Getting a bit sleepy and exhausted with a slight headache, though this could be due to my lack of sleep and stressful morning of juicing and not the detox.

8.50am – Decide to go and rest in bed, so glad to be a uni student on holidays!

10.17am – Get a call from my boyfriend at work and chat about how we’re feeling and our plans for the week, finish my last quarter of juice one and feel refreshed but still a bit lethargic.

11.36am – Just got a tiny hunger pang, time for Juice #2: Celery, Apple, Ginger and Kiwifruit aka “Immuno Booster”. Another green one, this one is nice and refreshing. Feeling good!

12.42pm – Still working on Juice #2 (I’m such a slow poke!) and actually feel quite full!? Who knew juice could be so filling!

1.30pm – Called my boyfriend who is struggling, “Baby, this is so shit”. He’s not enjoying it at all! I wouldn’t want to be at work and having to use my brain too much today, must be hard.

2.00pm – A bit late on Juice #3: Carrot, Parsley, Beetroot and Ginger aka “Ginger Minge”. Holy crap, this one is disgusting! Way too much ginger! Pulled the foulest of faces attempting to skull this one, it helped a little bit to heat it up as a soup as suggested in my recipe book. Couldn’t for the life of me finish it, absolutely gross. Exchanged some texts with my boyfriend about how horrible it was.

3.15pm – Out shopping for more ingredients – I’m allergic to almonds which is a major ingredient in Juice #6 so was on the hunt for hazelnut milk and hazelnut meal to substitute. Wandering around the supermarkets looking for anything hazelnut and my inner monologue is going something like this: “Ohh look at all the bread, No! No, I don’t even want bread, I don’t even like bread. So doughy, mmmm. What’s that? Sushi! I mean..pffft who likes sushi? I don’t. I don’t even want any. I’m gonna go home and drink some juice, awww yeah. What’s that? Pizza! OMG I WANT PIZZA! Wait, no I don’t. Pizza sucks. Detoxing is good. Healthy healthy healthy..chocolate!?” The moral of the story being: For the love of God don’t go to a supermarket/anywhere that sells food while detoxing! And while we’re at it, don’t even listen to the radio. Or watch TV. It’s insane how many food ads there are or how often people talk about food. Torture.

4.30pm – Just got home from shopping. A bit late again for Juice #4: Rockmelon, Watermelon, Blueberries and Mint aka “Summer Burst”. Was looking forward to this one – it sounds so yummy! – but was a bit disappointed by the blueberry floaties which make it hard to enjoy drinking. Anyone who knows me knows I hate “bits” in my food, I’m weird about texture. Yes, other people are too, I’m not that odd.

6.00pm – My boy gets home from work and the first thing he says when coming in the door is, “Ahhhhh, I’m so hungry!”. Good thing I’m making our Dinner Juice/Soup #5: Tomato, Carrot, Basil, Capsicum and Garlic aka “Martie Toe”. Now this one is good. It tastes just like a yummy tomato soup – well, a watered down version. The basil in it is delicious. We decide to replace the ghastly Juice #3 with this one tomorrow. So much tastier.

6.35pm – The two of us set up in the kitchen to make up the four juices for tomorrow. After the crazy rush this morning, we decided it wasn’t worth draining our energy in the morning making juices on a deadline. As much as we couldn’t be bothered doing it now either, it was much better to do it now than in the morning. Ideally, the juice should be consumed as close as possible to the time it was juiced – which is why it makes more sense to juice your fruit and veggies in the morning. We’re happy to sacrifice some freshness and some loss of vitamins for the sake of our sanity.

7.45pm – I prepared the pumpkin juice earlier for Juice #6: Pumpkin, cinnamon, Hazelnut Milk and Hazelnut Meal aka “Pumpkin Pie” so I just popped the rest of the ingredients in a glass and stirred it around for our “dessert juice”. We were a bit skeptical about this one but it was surprisingly tasty. An acquired taste, but drinkable – even if it did have a few floaties.

8.00pm – We sit down to watch a movie, both pretty exhausted.

9.00pm – Bedtime! I know, ridiculously early, but the detox kit recommends you get an extra long sleep tonight and we were both ready to just pass out.

10.13pm, 11.17pm, 12.34am – Keep waking up to pee – too much damn liquid in my system! All I want to do is sleep!

1.23am – Wake up again with an incredibly dry throat and a bit of a cough. Try to have enough water to help my throat but not too much so as to wake me up an hour later to pee again.

Well, that was Day One of my DIY Detox. All in all, not too bad. Yes it really sucks not eating solid foods but I keep trying to remind myself of why I am doing this and how great I will feel afterwards. My body will love me for it. I think it’s much harder for my boyfriend – a first time detoxer – as he hasn’t experienced the amazing post-cleanse feeling so it’s hard for him. I’ve been trying to remind him to think positively and about the goal – but then he just starts talking about cupcakes and opening the pantry to smell some crackers or something. I think he’s getting a bit delirious.

Here’s to Day Two! Wish me luck!
Eleanor x

DIY Detox Diary: Preparation

Around this time last year I decided to do a detox that I had been told about. This one wasn’t about eating only carrots or living off lemon juice, cayenne pepper and water for 2 weeks (like the Lemon Detox Diet – worst detox you can do, so unhealthy!). Instead, this was a Juice Cleanse. The idea is that you only drink juice for 3-5 days while detoxing. The juices are specially formulated to provide you with adequate nutrients during your detox while also being packed with vitamins and minerals to help restore, revitalise and rejuvenate your body.

Last year, I did a 3 day, Level One cleanse with Urban Remedy which set me back over $200 as all my juices were delivered fresh to my door. I had amazing results after just 3 days and felt the healthiest, clearest and most energetic I have ever felt before in my life. Amazing!

So, it is no surprise that I was keen to do another detox this year (ideally I’d like to cleanse once every few months). Unfortunately, however, my bank account wasn’t willing to shell out another $200-$300 for the 5 day cleanse I wanted to do this time. So, I started researching for recipes to do it myself at home – because I was lucky enough to receive a brand spanking new juicer a few weeks ago from my ever so wonderful boyfriend – details here. Lucky for me, I came across the DIY Detox Kit offered by Schkinny Manniny (I know, horrible name right?).

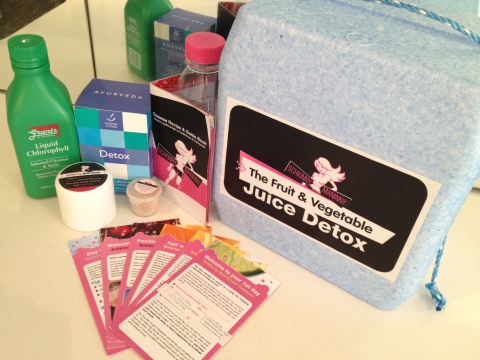
Juice Cleanse Materials

The Schkinny Manniny DIY Detox Kit

This Kit Contains:

  • Recipe Booklet
  • Daily Cards with Do’s and Don’ts
  • Esky
  • 6 Water Bottles
  • Liquid Chlorophyll
  • Detox Tea
  • Bath Soak
  • Psyllium Husks
  • Loofah for Dry Skin Brushing (not pictured)

After waiting desperately for over a week to receive my kit I hurried out to my local fruit shop as soon as I finally got my kit with the recipes and ingredients to buy all the fruit and veggies I would need for my 5 day cleanse.

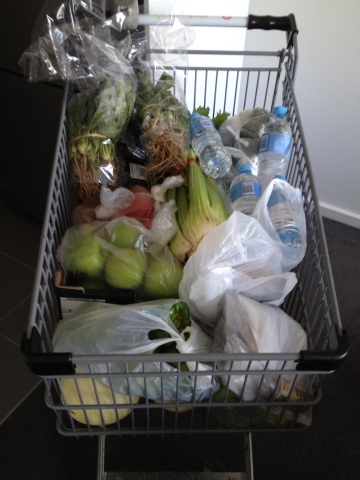
Somehow, my boyfriend managed to jump on board so we went shopping together and bought double the ingredients listed in the recipe booklet. We were in the fruit shop for a good half an hour getting everything – I worried we might clean them out! We had 3 baskets full and I dreaded the total. Luckily, it always pays to go to local fruit shops over supermarket chains and we were set back only $88.30 for 5 days worth of fruit and veggies for the tow of us. Pretty damn good if you ask me!

Shopping for Juice Cleanse

Trolley full of fruit and veggies - there's more underneath!

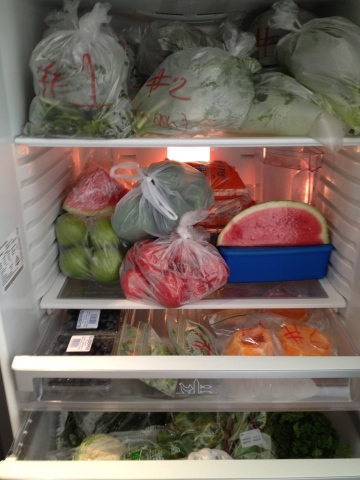
I’m a bit of an organisation junkie. So, I decided it would be easier for my sanity in the morning to portion up all the ingredients into groups for each juice so I could easily throw all the ingredients in the juicer rather than spending ages chopping and peeling and riffling through the fridge to find the ingredients for each juice I had to make for the day. I have to admit, I also got a kick out of organising, ordering and labelling my fruit and veggies into containers and freezer bags.

Juice cleanse

mmm so organised 🙂

Well, that is all from me for now. I will be updating my blog with my progress with daily posts throughout my detox – stay tuned!

Have you ever tried a detox/juice cleanse? What did you think?

Eleanor x

Pretty Pink Fairy Dust Cupcakes

I was invited to a 4th Birthday over the weekend and was asked to make some cupcakes. My only brief was pink and sparkles – so that is just what I did! I was planning to go all out with these cupcakes by making fondant flower and butterfly cupcake toppers but ended up getting a lot of unexpected work in the few days before the party, so had to quickly whip up a basic recipe in a couple of hours and do what I could. They were just a basic vanilla cupcake with buttercream frosting – the kind of cupcake that requires ingredients that I always have in the cupboard. I picked up some pink sprinkles for these particular cupcakes and had everything else I needed at home. Of course, being me, I got this recipe from Jennifer Graham’s The Crabapple Bakery Cupcake Cookbook.

Vanilla Cupcakes with Buttercream Frosting

pretty pink icing with pink sparkles and glitter 'fairy dust'!

Vanilla Cupcakes

Makes 24

Ingredients:

  • 2 3/4 cups plain flour
  • 2 teaspoons baking powder
  • 200 grams softened unsalted butter
  • 1 3/4 cups caster sugar
  • 4 eggs
  • 1 tablespoon vanilla extract
  • 1 cup milk

Method:

  1. Preheat oven to 170°C and line muffin tin with cupcake papers
  2. Sift together flour and baking powder and set aside
  3. In a separate bowl, cream the butter for 1-2 minutes
  4. Add the caster sugar a third at a time, beating for 2 minutes after each addition
  5. After the last addition, beat until the mixture is light and fluffy and sugar is almost dissolved
  6. Add eggs one at a time, beating for one minute after each addition or until light and fluffy
  7. Add the vanilla extract and beat until combined
  8. Add a third of the flour to the creamed mixture and beat on low speed until combined
  9. Add half the milk and beat until combined
  10. Repeat process
  11. Add the remaining third of the flour and beat until thoroughly combined – do not over beat or mixture will toughen
  12. Spoon mixture into cupcake papers, filling each about three-quarters full
  13. Bake for 18-20 minutes or until a skewer comes out clean
  14. Remove cupcakes from tray and place on a wire rack to cool
  15. Wait at least 30min before icing

Buttercream Frosting

Again, this recipe is from Jennifer Graham’s The Crabapple Bakery Cupcake Cookbook. It is the same recipe used for the icing on my Christmastime Cupcakes.

Ingredients:

  • 200 grams softened unsalted butter
  • 1/2 cup milk
  • 1 tablespoon vanilla extract
  • 8 cups icing sugar

Method:

  1. Cream the butter for 1-2 minutes
  2. Add the milk, vanilla extract and half of the sifted icing sugar (4cups)
  3. Beat for at least 3 minutes or until light and fluffy
  4. Add remaining icing sugar and beat for a further 3 minutes or until light and fluffy and of a spreadable consistency
  5. Add extra milk if too dry or extra icing sugar if too wet
  6. Add food colouring/flavour (for my cupcakes I used 1/4 teaspoon pink food colouring)
  7. Pipe onto cupcakes in an ice cream swirl design
  8. Immediately top with pink sparkles/crystals and dust with edible glitter

As I was making these cupcakes for a child’s party, I made them in small patty pans. They look very cute when they are little as opposed to big ones. Feel free to do what you like and experiment. Even if you don’t make pretty pink fairy dust cupcakes, this is the most basic vanilla cupcake recipe that you can use and choose your own design.

Happy Baking!

Eleanor x

Housewarming Cookies!

I made these cookies for a close friend of mine last year when she and her boyfriend bought their first house (at 21 years old!). I was so happy for her and wanted to do something a little bit fun and special. And of course, being me, I was thinking of what I could do that was fun and special (and house themed) within the realms of baking.

I’m a huge fan of Annie’s Eats – I literally drool looking the pictures of her creations – and I came across this recipe for sugar cookies with royal icing one day while idly paging through her many recipes. Anyone who is a regular over at Annie’s Eats will know that she is a tad bit obsessed with making and decorating sugar cookies – any occasion will do, halloween, easter, christmas, thanksgiving, valentine’s day, baby showers – anything!

I thought it was high time to attempt the old sugar cookie and took myself over to Queen Baker to find myself a house-shaped cookie cutter. Unfortunately, being an Aussie who uses the metric system, Annie’s lovely recipe with imperial measurements wasn’t going to work for me. So instead I used this recipe below from a cookbook my boyfriend’s mother gave me. I included the link above to Annie’s recipe for those of my readers who may be on the imperial system.

Housewarming Cookies

Little Sugar Cookie Houses!

Sugar Cookies

Ingredients:

  • 3 cups plain flour
  • 1 teaspoon bicarb soda
  • 2 teaspoons baking powder
  • 1/2 cup butter/margarine
  • 1 cup caster sugar
  • 1/2 teaspoon vanilla essence (I used extract)
  • 1 egg
  • 1/2 cup milk

Method:

  1. Sift the flour, bicarb soda and baking powder into a small bowl and set aside
  2. With an electric mixer, cream together the butter, caster sugar and vanilla until the mixture is light and fluffy
  3. Add the egg and beat well
  4. Add the flour mixture alternately with milk to make a soft dough
  5. Wrap in glad wrap and chill in fridge for at least 30 minutes
  6. Preheat oven to 180°C
  7. Roll out the dough on a lightly floured surface to 3mm thick
  8. Cut into shapes with cookie cutter
  9. Transfer to baking tray and cook for 10-12 minutes
  10. Cool on a wire rack before icing

I wasn’t game enough to try making royal icing from scratch, I’ve heard so many people groan at the thought of making their own royal icing, so I cheated and used the Queen Royal Icing packet mix. Plus, I was a bit pressed for time as I had a mountain of assignments that happened to be due at that time.

In other words, I was procrasti-baking. Yes, it’s a thing. Proof. See?

Some tips for the Royal Icing:

  • Don’t add too much water when first mixing or it will go too runny
  • Start decorating by tracing an outline of your shape and your design
  • Let that dry and then water down the royal icing and flood the area within the lines to create a smooth finish
  • For more tips on royal icing see here

Eleanor x